Authenticate Yourself!
No, it’s not hippy lifestyle advice. It’s Two-Factor Authentication (2FA) and new Mastodon users should be using it.

Trust me, I’m going to walk you through this process and make it as easy as baking a pie. You can scroll down to “Follow these steps to set up 2FA on Mastodon” if you just want to get started. First, I’m going to tell you why you need 2FA on your accounts.
In 2021, some 5.4 million people on Twitter were victims of the dark web. A hacker used a vulnerability in Twitter to gain access to the emails and phone numbers of a huge number of people, and then proceeded to sell that information for some $30,000.
Breaches like this happen every month. Your personal information, including email, phone number, place of residence, children’s names, the school your wife attended, and so much more is probably already up for sale.
There are some good privacy practices you can learn to use, and I recommend reading Firewalls Don’t Stop Dragons to learn more.
However, there’s one thing you can do to protect yourself, right now, on almost any service and app you use. It’s called two-factor authentication, and it helps ensure your safety.
Mastodon and security
Mastodon is actually safer, in many ways, than Twitter. But no matter how secure a service is, it’s important to practice good personal safety as well. The easiest way to do this is by adding two-factor authentication (2FA) to your account.
2FA is just a fancy term for “suspicious attempts to log into this account require a second form of verification.” It’s a way to make sure that the person trying to use your email and password to log into your account… is really you, and not some hacker who stole your login information.
Follow these steps to set up 2FA on Mastodon

- From the Mastodon web browser, to Preferences.
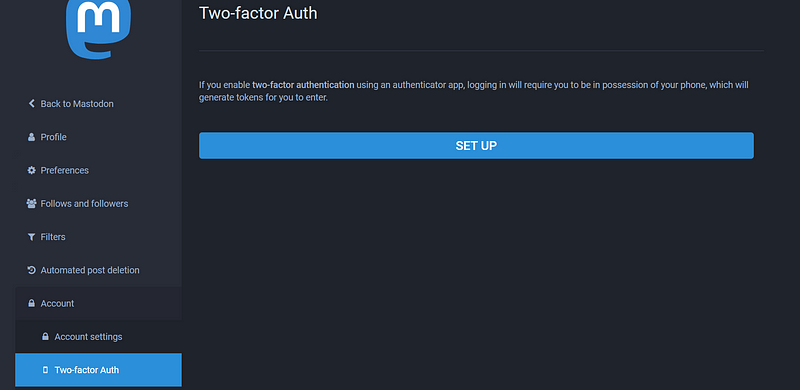
- Click on “Accounts,” then click on “Two-Factor Authentication/Two-Factor Auth.”
- Click on “Set Up.” You’ll need to re-enter your password on the next screen.

- Download an authenticator app. I prefer Authy since it’s widely used, works on all mobile devices and desktops, and is fast.
- Install Authy and follow its directions.
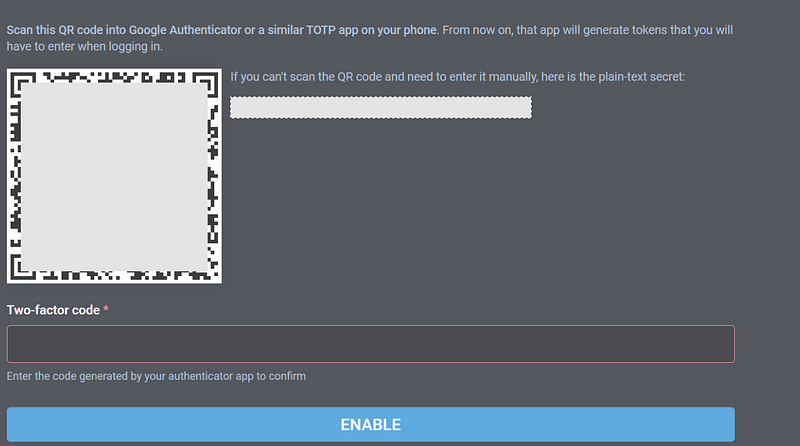
- Using Authy’s built-in scanner, scan the QR code from your Mastodon 2FA page (as seen above). You could also manually enter the code.
- Mastodon will prompt you to save your “backup codes.” If you ever lose your password, and you also don’t have access to Authy, these codes can each be used once to let you into your account. Save them by writing them down and securing them, or by saving them in a password manager.
- All done!
Setting up 2FA really is that easy. It makes your account far more secure, is easy to implement and use, and helps keep yourself and your whole community safer.
