
Auto-leveling your Anycubic Kobra Plus 3D Printer
The Kobra printers have a great auto-leveling feature, can you use it?
One of the biggest draws for the Kobra line of 3D printers from Anycubic is the automatic leveling feature included in the software. Historically, auto-leveling has been hit or miss, especially for printers at lower price ranges, but with Anycubic’s Kobra Plus, reality and the promise of auto-leveling have finally aligned!

You’ll absolutely want to do this the first time you set up your new Kobra Plus printer, and you can make sure your print bed is leveled in the future before big prints with just a few button presses.
Turn printer on and prepare your Kobra printer

Just tap “prepare” from the main menu.
Select “leveling” from the Kobra menu

In the prepare screen, tap “leveling”.
Initiate auto-leveling
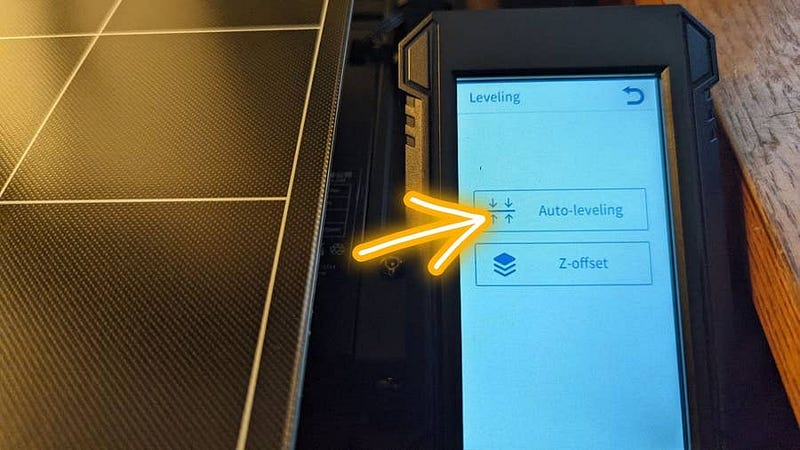
Tap “auto-leveling” in the menu, this will tell your Kobra Plus to begin its auto-leveling program.
Test the Anycubic Kobra Plus nozzle
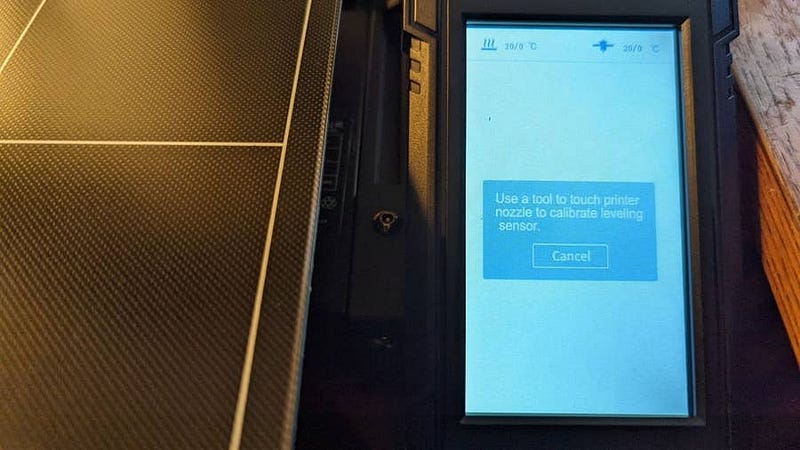
Doing this melts any excess plastic in the nozzle, and also ensures that the Kobra Plus’s sensors are calibrated correctly. In the past, there were issues with certain models punching the nozzle into the plate, so this sensor test ensures that the printer is reading its inputs correctly.
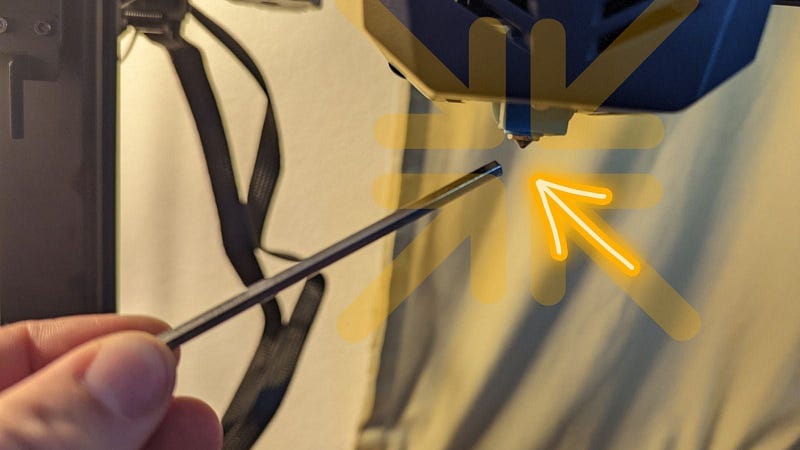
You could use the flat side of a hex wrench, or the flat side of the included metal wrench. Hold it against the nozzle’s point until the printer reads it and moves on.
Homing

After the nozzle has been tested, the printer head will return to home. Wait for this to complete.
Preheating
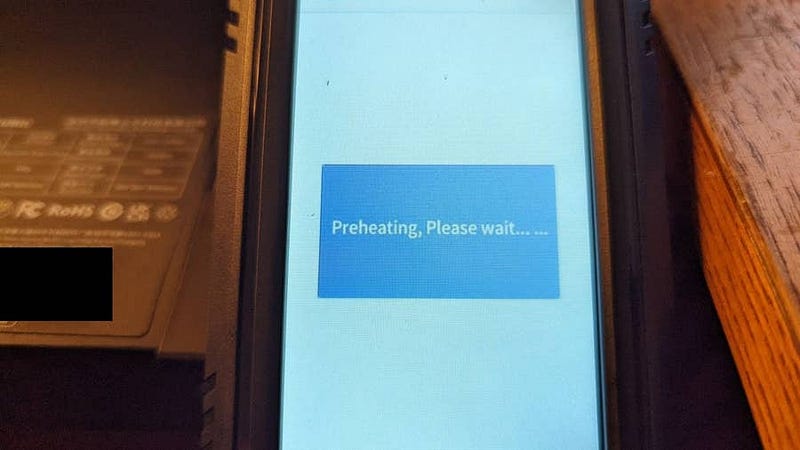
Allow the printer to preheat for its full test cycle. This can take a few minutes, so go make yourself a sandwich.
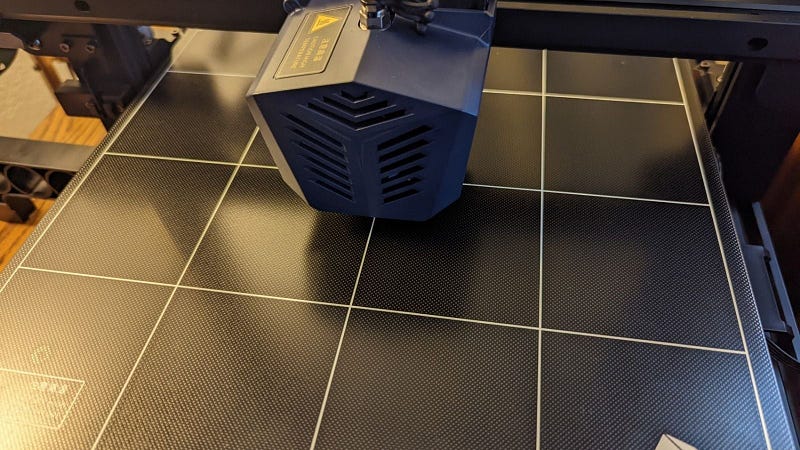
Probing: The main auto-leveling step
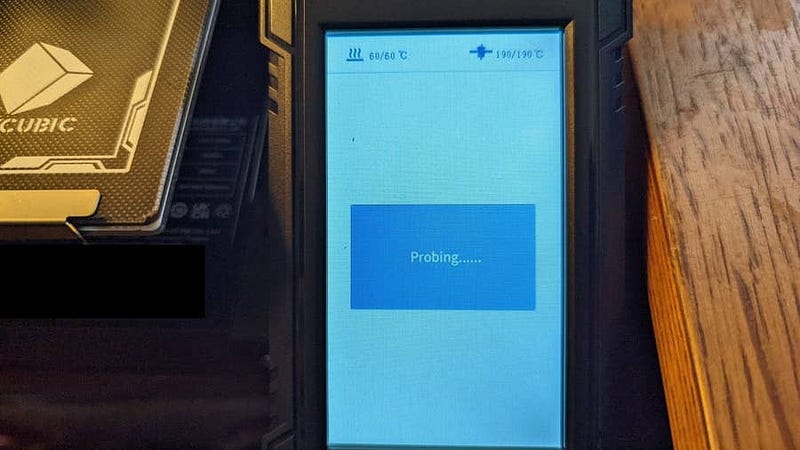
Once ready, your Anycubic Kobra Plus 3D printer will begin the process of probing the print plate at pre-defined points to ensure a perfectly level build platform.

As long as you’ve tightened the screws beneath the printer’s build plate and on the printer head, this step should go off without a hitch. Wait for the process to complete, and you’ll be ready to print!
I recommend repeating this process between major prints, at the least, to ensure that all your projects come out grand.
Interested in this 3D printer? Check out my review on Anycubic’s Kobra Plus!
